A teacher has a PowerPoint presentation on Big Data. It explains how big data works to a Grade 6-class. The presentation goes to slide 4 where there is a flowchart to explain the process. From Slide 4 the teacher wants to click on a certain point in the flowchart that will jump to the explanation of that point in the presentation. The teacher wants an interactive presentation.
Create Links for an interactive presentation
To have an interactive presentation one creates links.
There are different ways in which you can create these links. You can link to the text or you can link to a button or an image. These links are known as hyperlinks.
Let’s have a look at how to create hyperlinks.
Link a button to another slide in an interactive presentation
Create the button
Because this PowerPoint consists of slides jumping all over the place, buttons are used to move to the next slide. This might not be the next slide in the order that the slides are arranged. This is where the interactive presentation comes in.
First, an image is added. Click on the arrow of the small dialog box on the Home Ribbon under the Drawing section.
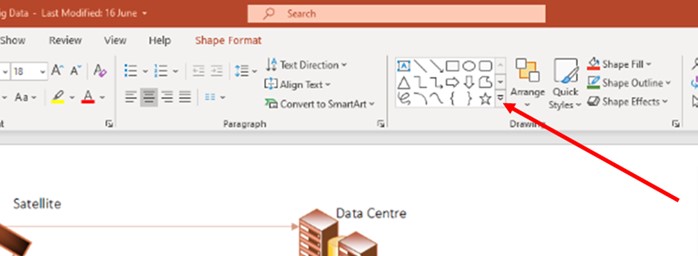
You will see the following:

There are Rectangles, Basic Shapes, Block Arrows, Equation Shapes, Flowchart shapes, Stars and Banners, Callouts and Action Buttons. Select that image that will serve your purpose for the button. On this presentation the Go Forward or Next Action Button was used.
Insert the button where you need it. Here you can find it on the bottom right of the slide.
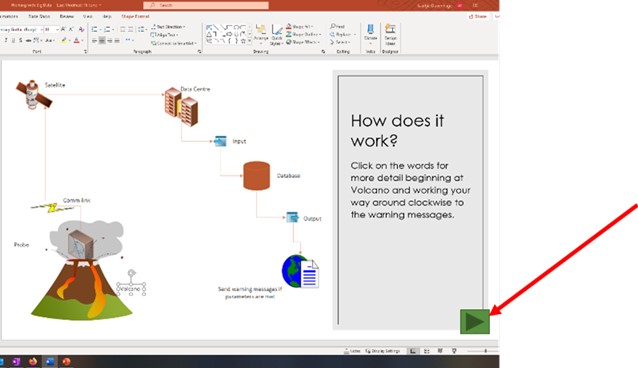
Create the link
Right click on the button. Find the term Link.
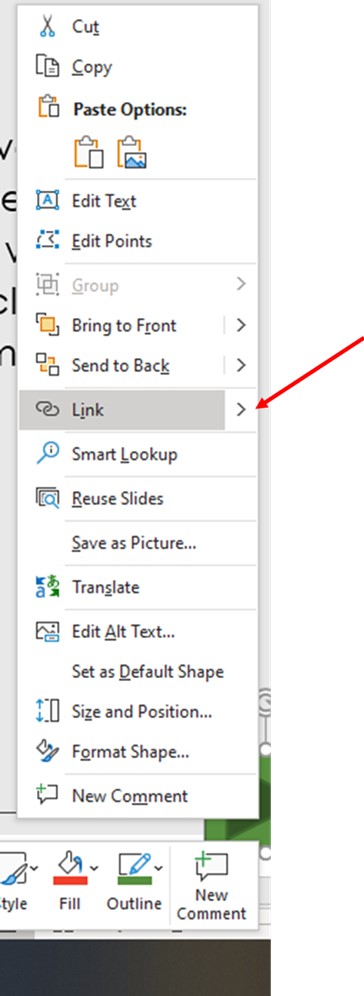
If you click on the arrow on the right of Link, you will find a list of the most recent documents you worked on. If you want a document to open when the person clicks on the button, you can select one of those.
Or, you can just click on the word Link. A new dialog box appears.
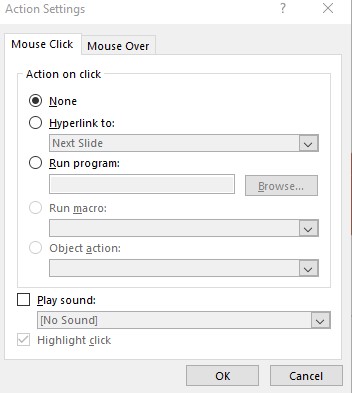
There are two types of options: there will be action when the mouse is clicked on the button or there will be action when the mouse moves over the button. Mouse Click is the wiser option.
Now you can select the action you want to take place when a person clicks on the button. The default setting is None. The action that we want to take is Hyperlink to:. Click on the radio button. The default option is Next Slide. But in this case we want to move to a completely different slide. So click on the arrow pointing down next to Next Slide. The following options will appear.
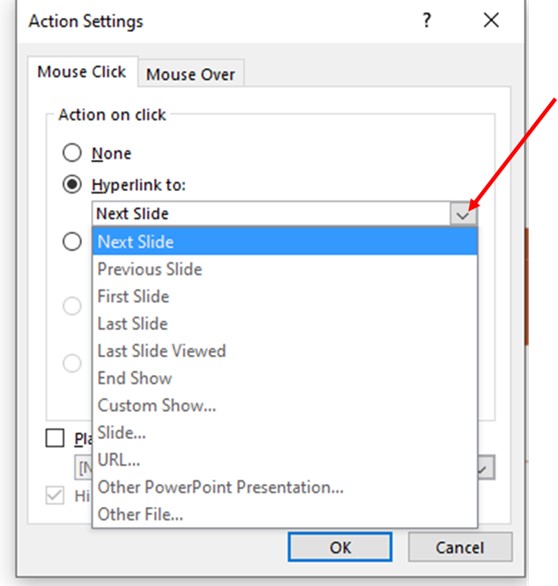
There is a range of options. You can move to the Next Slide, Previous Slide, First Slide or End Show. The one that we are looking for is Slide… You will now get a dialog box that lists your slides.
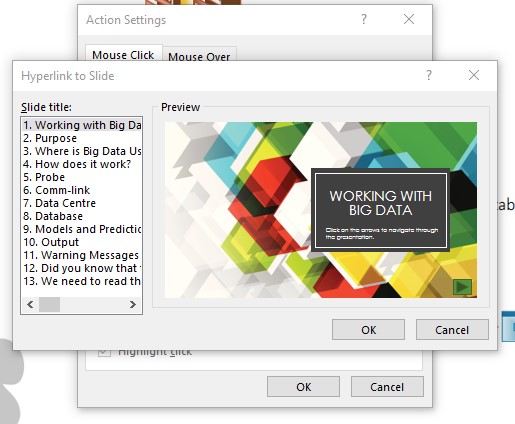
Click on the slide that you want to go to. Click on OK and again on OK.
Try it out. View your presentation, click on the action button and see where it takes you.
Link through text to a web address for an interactive presentation
The next type of hyperlink that you can create is a link through text. When you click on the text, it will take you through to something else. Let’s click on Volcano and let it take us through to a YouTube video on volcanoes. Right click on the word volcano. A dialog box will appear.
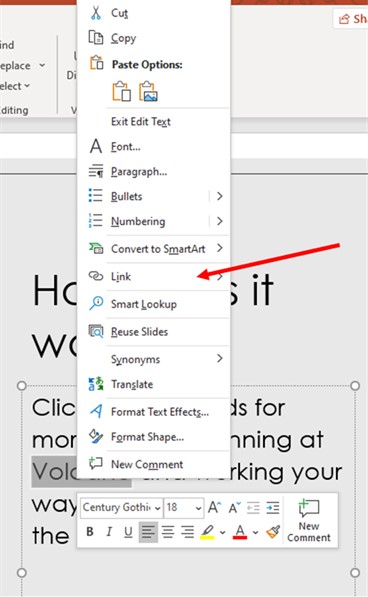
Click on Link. This time a different dialog box appears.
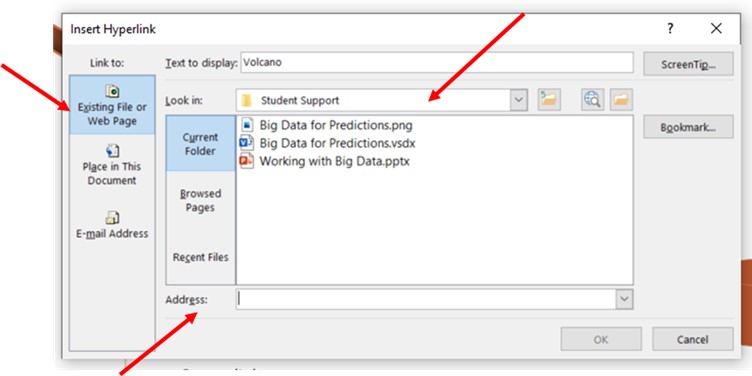
There are different options that one can find on the left side of the dialog box. A person can choose an Existing File or Web Page. Find the different folders and files on your computer on the right. Just a word to the wise… keep the files of one presentation together in one folder. Address: is where you can enter the web address of a YouTube file that you want viewers to see.
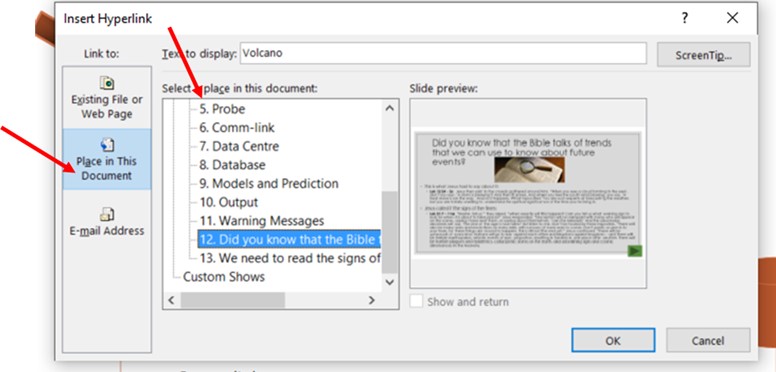
If you want to move to another slide in the presentation, clicking on Place in This Document brings up a list of all the slides in the document. Click on the slide that you want to use and click on OK.
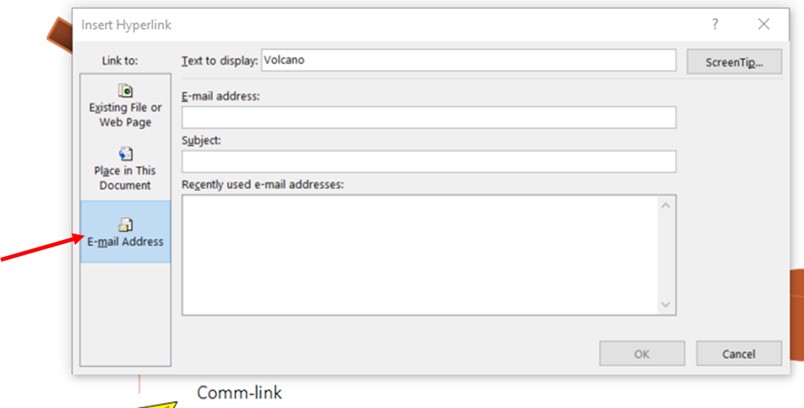
Selecting an E-mail Address will open an empty email addressed to the E-mail address entered in the link when one clicks on the word.
Linking to different points on a single image for an interactive presentation
A bit more advanced is the flow diagram that can be found on the slide. The teacher wants to use the flow diagram to move through a series of slides on each section of the flow diagram. But the whole flow diagram is one image, which includes text. It is not separate images with separate text. If it had been, you could have followed the above instructions.
Create a button
Now, you are still going to create a button on the area where you want people to click. Just remember to add instructions in this regard. In this presentation the teacher says to “Click on the words for more detail beginning at Volcano and work your way around clockwise to the warning messages.”
Start by selecting an oval from the Drawing section on the Home ribbon.

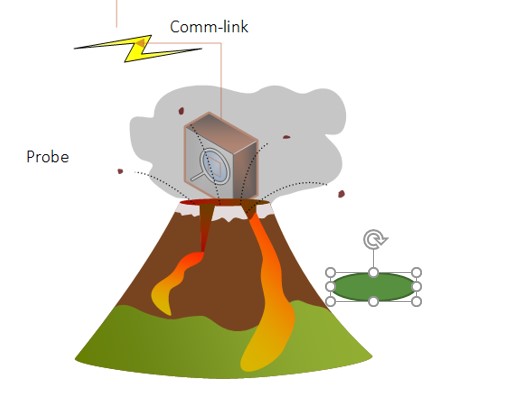
Draw an oval over the word that you want to cover by clicking on oval on the ribbon. The cursor will change to a cross. Place the cross at the left of the word, press the left button on the mouse and hold it in and drag it over the word. There is a problem. The oval blocks the word out.
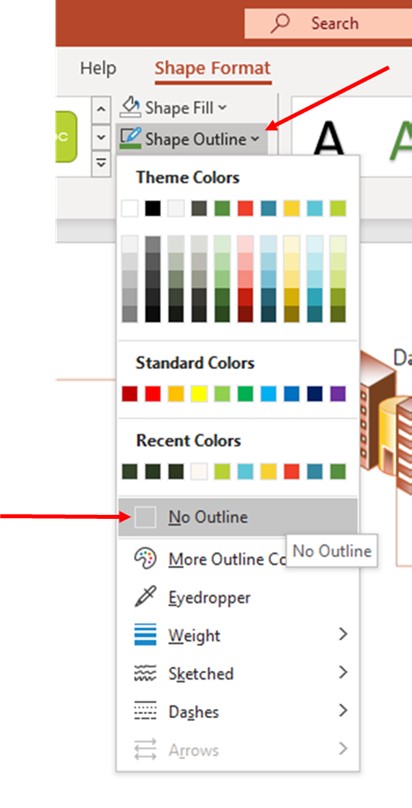
There are now different ways in which you can make the oval transparent. We will make use of the ribbon. Go to the Shape Format ribbon on the right if it did not open automatically. On the right of the Shape Styles section, click on the small arrow to the right of Shape Fill.
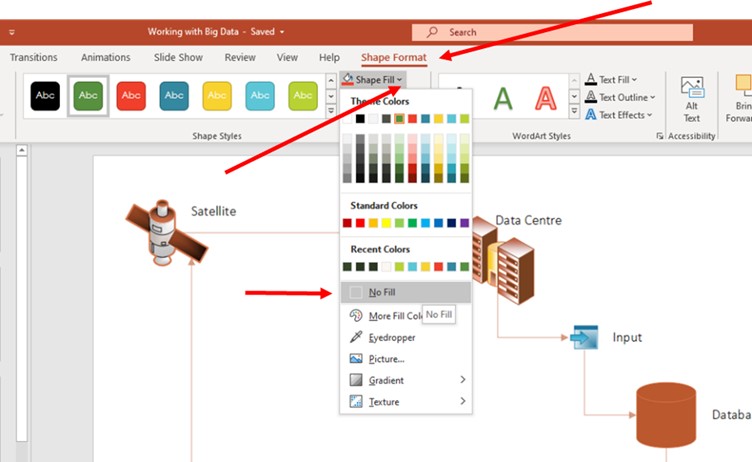
Select No Fill.
Do the same with the Shape Outline.
Create the link
Right click on the oval, select Link and repeat the process that we did with the text. Although you cannot see the button, when you hover over it, you can see the link.
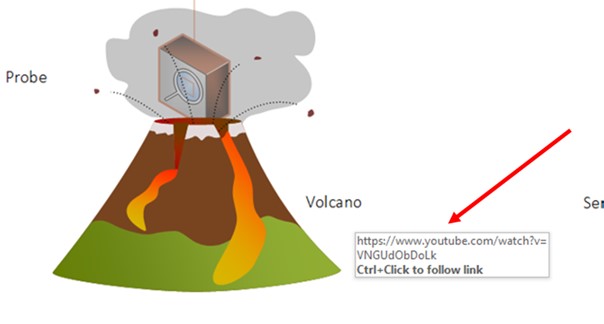
Just remember that none of the links will work in the part of the presentation where it is edited. These links will only work when the presentation is viewed.
Have fun creating your interactive presentation.

