It can make the life of any academic writer much easier when using automatic referencing in MS Word. The purpose of referencing is to ensure that the copyright or intellectual property right of the original author is respected. This can become a tedious exercise when writing an academic paper. Using the referencing tool in MS Word can make this much easier.
Set the Style
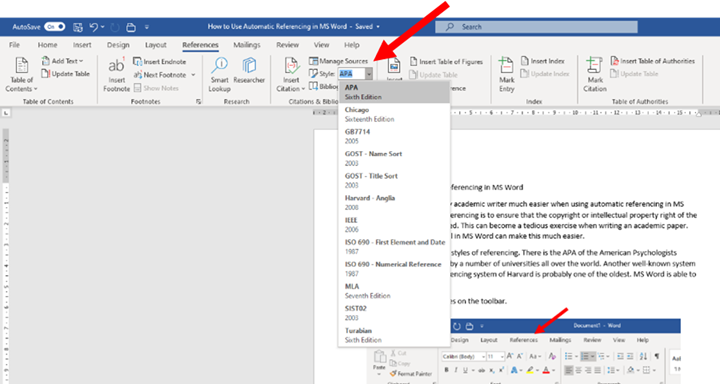
There are many different styles of referencing. There is the APA of the American Psychological Association, which is used by a number of universities all over the world. Another well-known system is Chicago while the referencing system of Harvard is probably one of the oldest. MS Word is able to handle most of these.
- Click on References on the toolbar.

- Find the Citations & Bibliography section and set the Style that you want to use by clicking on the drop down arrow and clicking on the Style you want to use.
Placing the First Reference
Author
- Place the cursor in the position where you want to place the reference and click on Insert Citation.
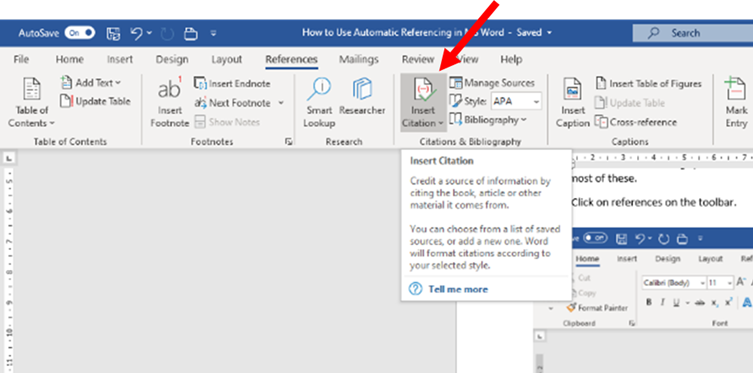
- Click on Add New Source…

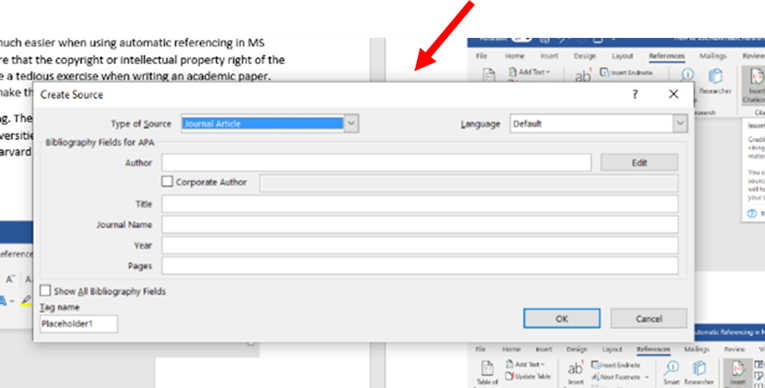
- A dialog box appears that you have to complete with the correct information.
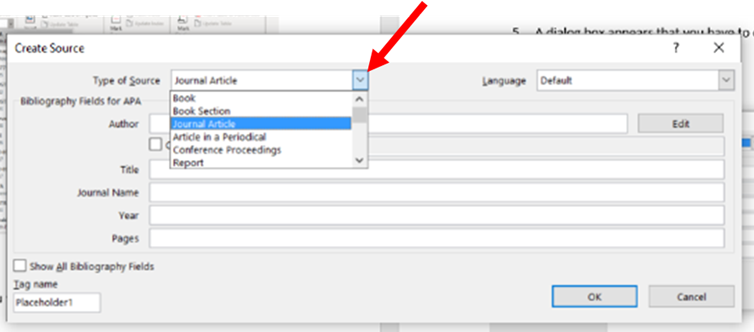
- Select the Type of Source you are using by clicking on the drop down arrow. Scroll down if you do not see the Type of Source you are looking for.
- If there is more than one Author, click on Edit.

- Type in the credentials of the first author and click on Add.
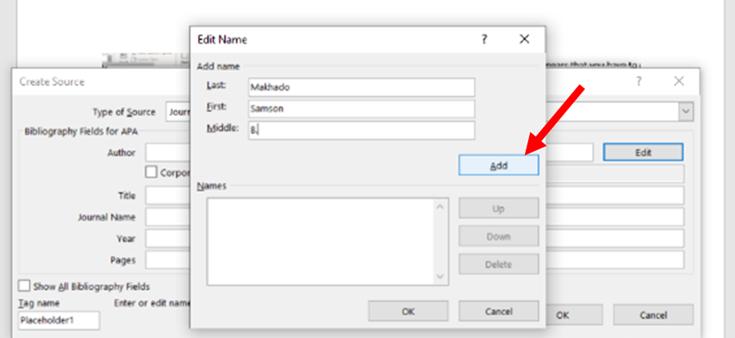
- Add the other Authors in the same way. If the order of the Authors is incorrect, you can change it by using the Up and Down buttons. Or if you made a mistake you can Delete the author. When you have completed the list of authors, click on OK.
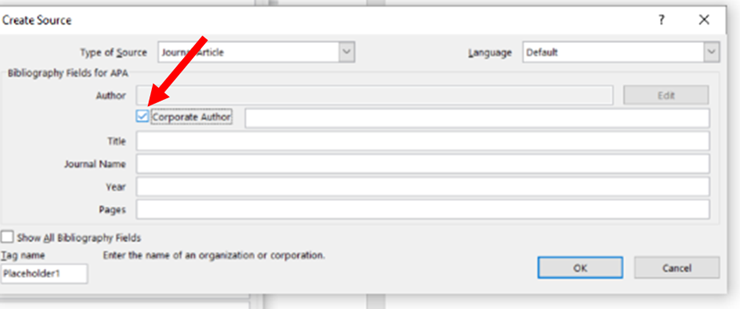
- Sometimes the Author is not a person but a company or an organisation. Click on Corporate Author. The greyed out section will become white. Type the name there.
Rest of the Reference
- Complete the Title and the rest of the information immediately below it. This would be different for different Types of Sources. The previous figure shows how it would look for a Journal. The figure below shows how it would look for a website. You have to complete the area as shown in the red square in the figure.
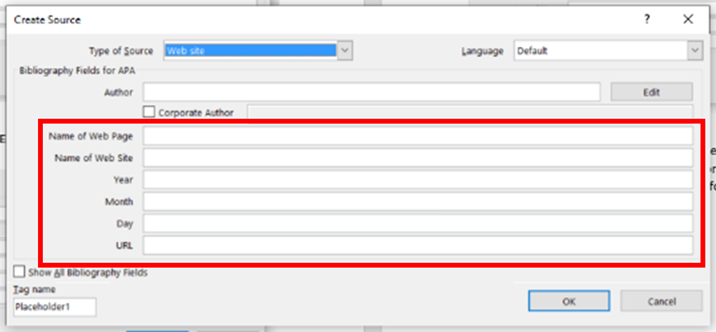
- When you are done, click on OK. The reference will appear where your cursor was in the following way: (Makhado, April 2016).
Some General Referencing Rules
Although different referencing systems have different rules, the following generally applies.
- Place the reference before a full stop and not after it. To use the same reference a second time, click on Insert Citation. You will now see a list of your references. Click on the one that you want to use.
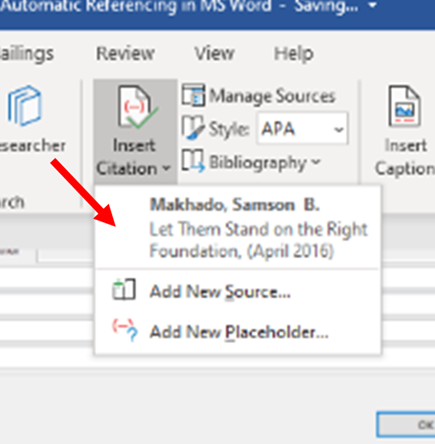
- If you refer to the Author in the text, the reference referring to the Author should not contain the Author’s name but only the date. In order to accomplish this, insert the reference as normal and then click inside the reference. It will change the colour to grey.

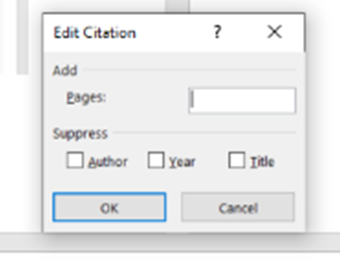
- Click on the drop down arrow and select Edit Citation. (If you click on Edit Source it takes you back to where you originally entered the reference and you can edit the original entry.)

- Select at the bottom of the new dialog box that the Author and the Title must be suppressed. If it is a direct quotation, complete the page numbers where it was taken from and click on OK.
Using a Reference from Another Document
If you want to use a reference that you have used previously in another document on the same computer:
- Click on Manage Sources on the References Ribbon.

- In the dialog box that appears you can find previous references on the left in the Sources available in Master List box by scrolling down or by entering a keyword in the Search box.
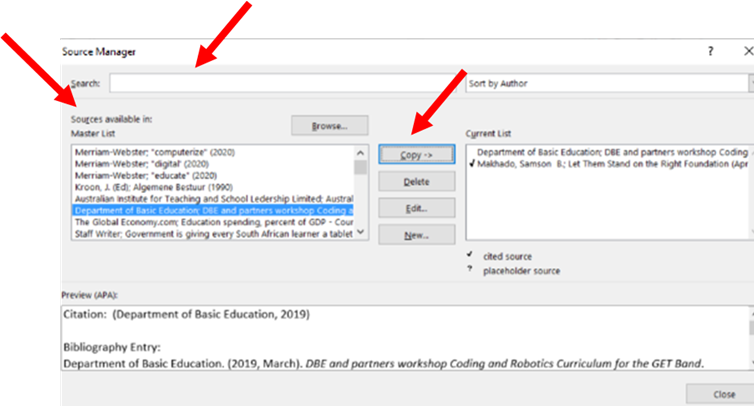
- Click on the reference you want to use in this document and click on the Copy button to copy it to the Current List (see previous figure).
Before Adding the Bibliography
When you have completed your document, the last thing is to add the Bibliography or Reference list. Before you can do that, however, there is one more thing that you have to do. You have to make sure you do not have any sources listed that you did not use in the end.
- Click on Manage Sources in the References ribbon as explained in number 17.
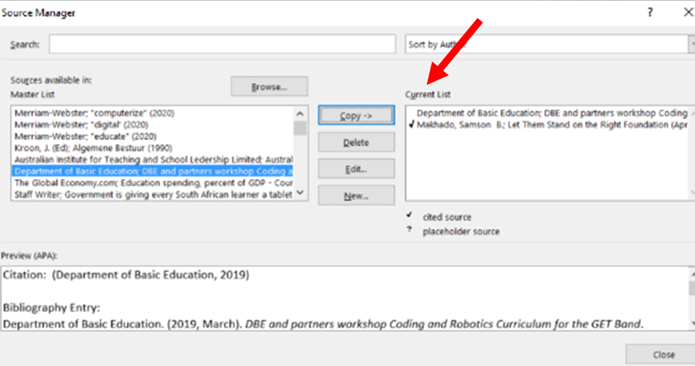
- On the new dialog box, the small box on the right shows all the References used in the document or your Current List. If there is a reference that has not been used, it will not have a tick against it. Click on all unused references and delete them by using the Delete button just to the left of the Current List.
Selecting More than One Simultaneously
- If there is more than one source right below one another that you want to select simultaneously, push the Shift button on your keyboard and keep it in while selecting the sources with your mouse.
- If there is more than one source that you want to delete but they are not immediately below one another, push the Ctrl button on your keyboard and keep it in while selecting the different sources with your mouse.
Adding the Bibliography
Now you can add your Bibliography or Reference List depending on your institution’s requirements.
- On the References ribbon, click on Bibliography.
- A list of choices will appear. Choose the type of Bibliography you need.
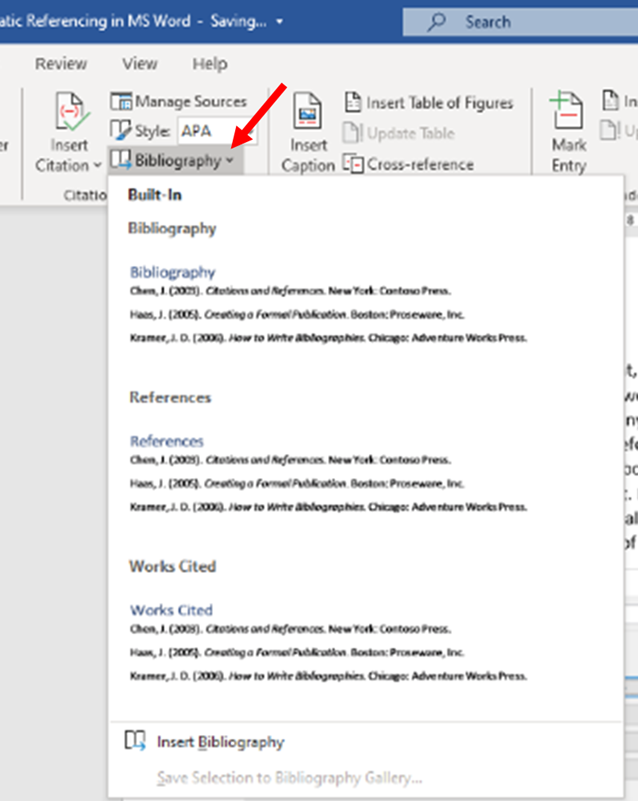
- It will appear where the cursor was – completely formatted.
Happy referencing!

